Set up your environment
We will be using Postman for the next few steps. If you have not yet downloaded the free version of Postman, click here to get started.
NOTE: Use this tool only for testing and prototyping your API requests.
- Import the Kindful Non-Oauth collection into Postman
- Add Your Token to Your Environment
- Send the first request to your custom app
- Check out your import in the Sandbox
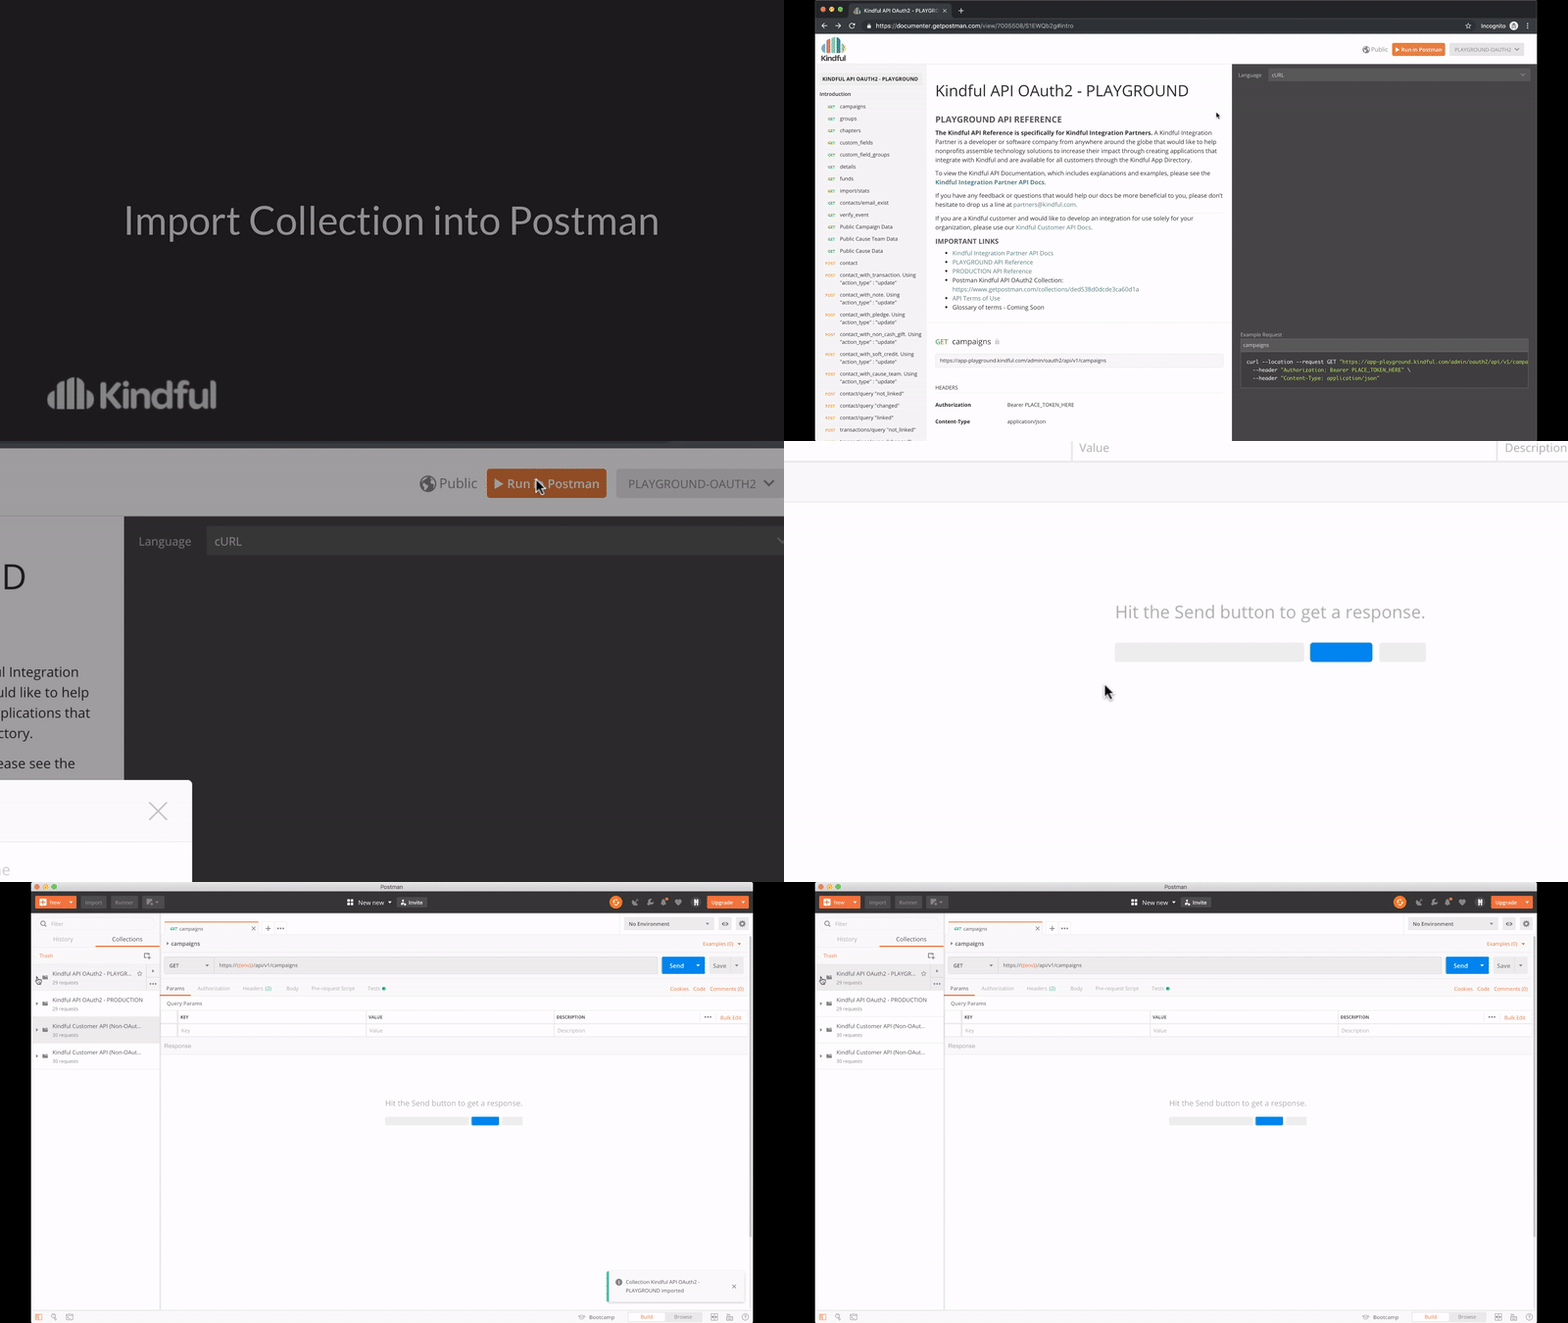
Import the Kindful Non-OAuth collection into Postman
Each Kindful Non-OAuth collection was created to simplify the process of knowing what calls you can make to the Kindful API and how to set up your environment. It includes sample endpoints that you will have access to so that you can test them.
- Download and install the Postman app
- Click the "Run in Postman" button for the collection you'd like to test from the options below.
- Select your version of postman on the dialog screen
- Your Postman UI should be updated with the collection. You should see all the requests you can make in the API.
- Configure the environment by defining the variables used in endpoints. An environment template was downloaded with the collection and can be updated via Manage Environments in Postman settings.
| Sandbox Collection of individual resource endpoints |
|
| Production Collection of individual resource endpoints |
|
Now, that you have all the calls imported, let’s update your environment so that you can send your first request.
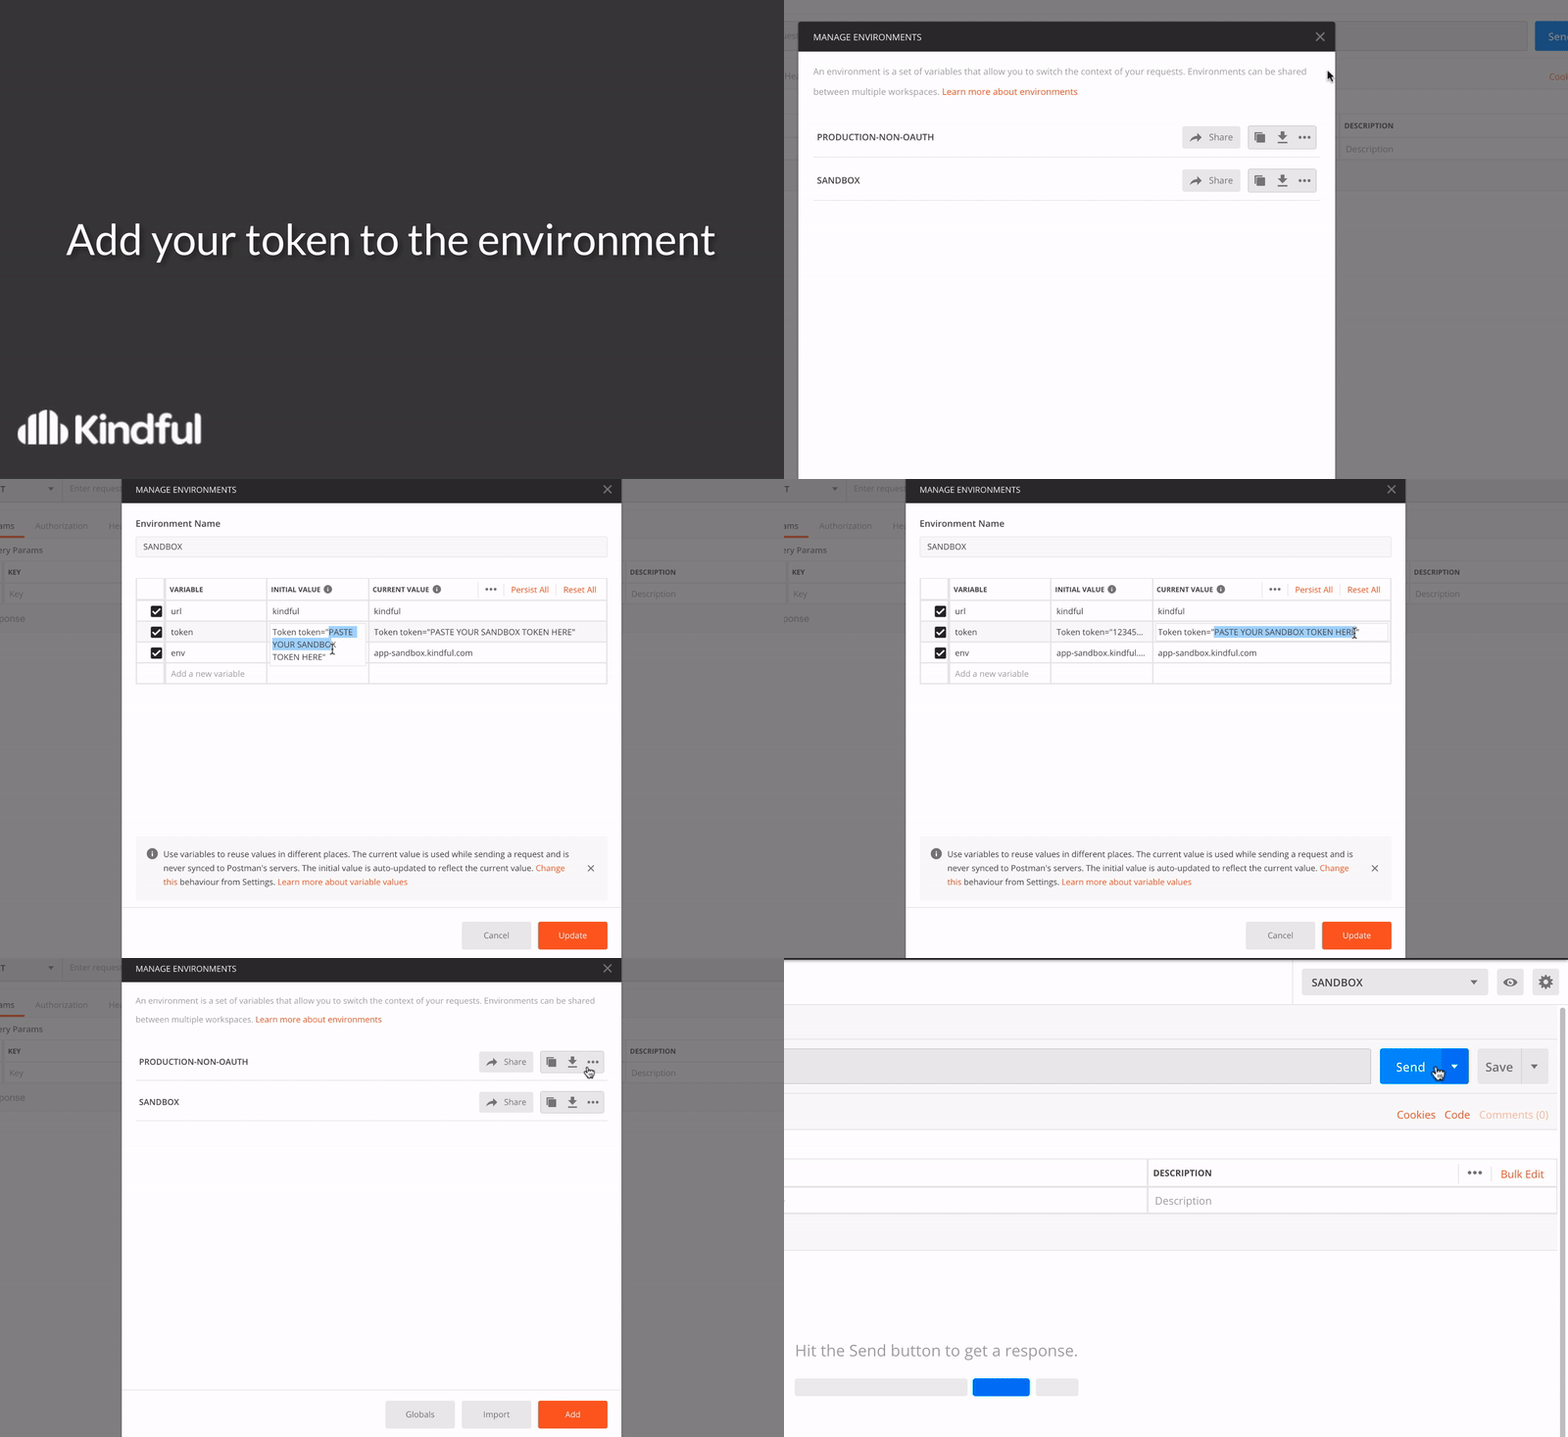
Add Your Token to Your Environment
- Inside of Postman, click the cog in the top right hand corner of the screen.
- Click on the environment name that you would like to update.
- Update your token in the environment
- Click "Update"
- Close the dialog box
- Select the environment from the select menu
You're all set!
Send the first request to your custom app
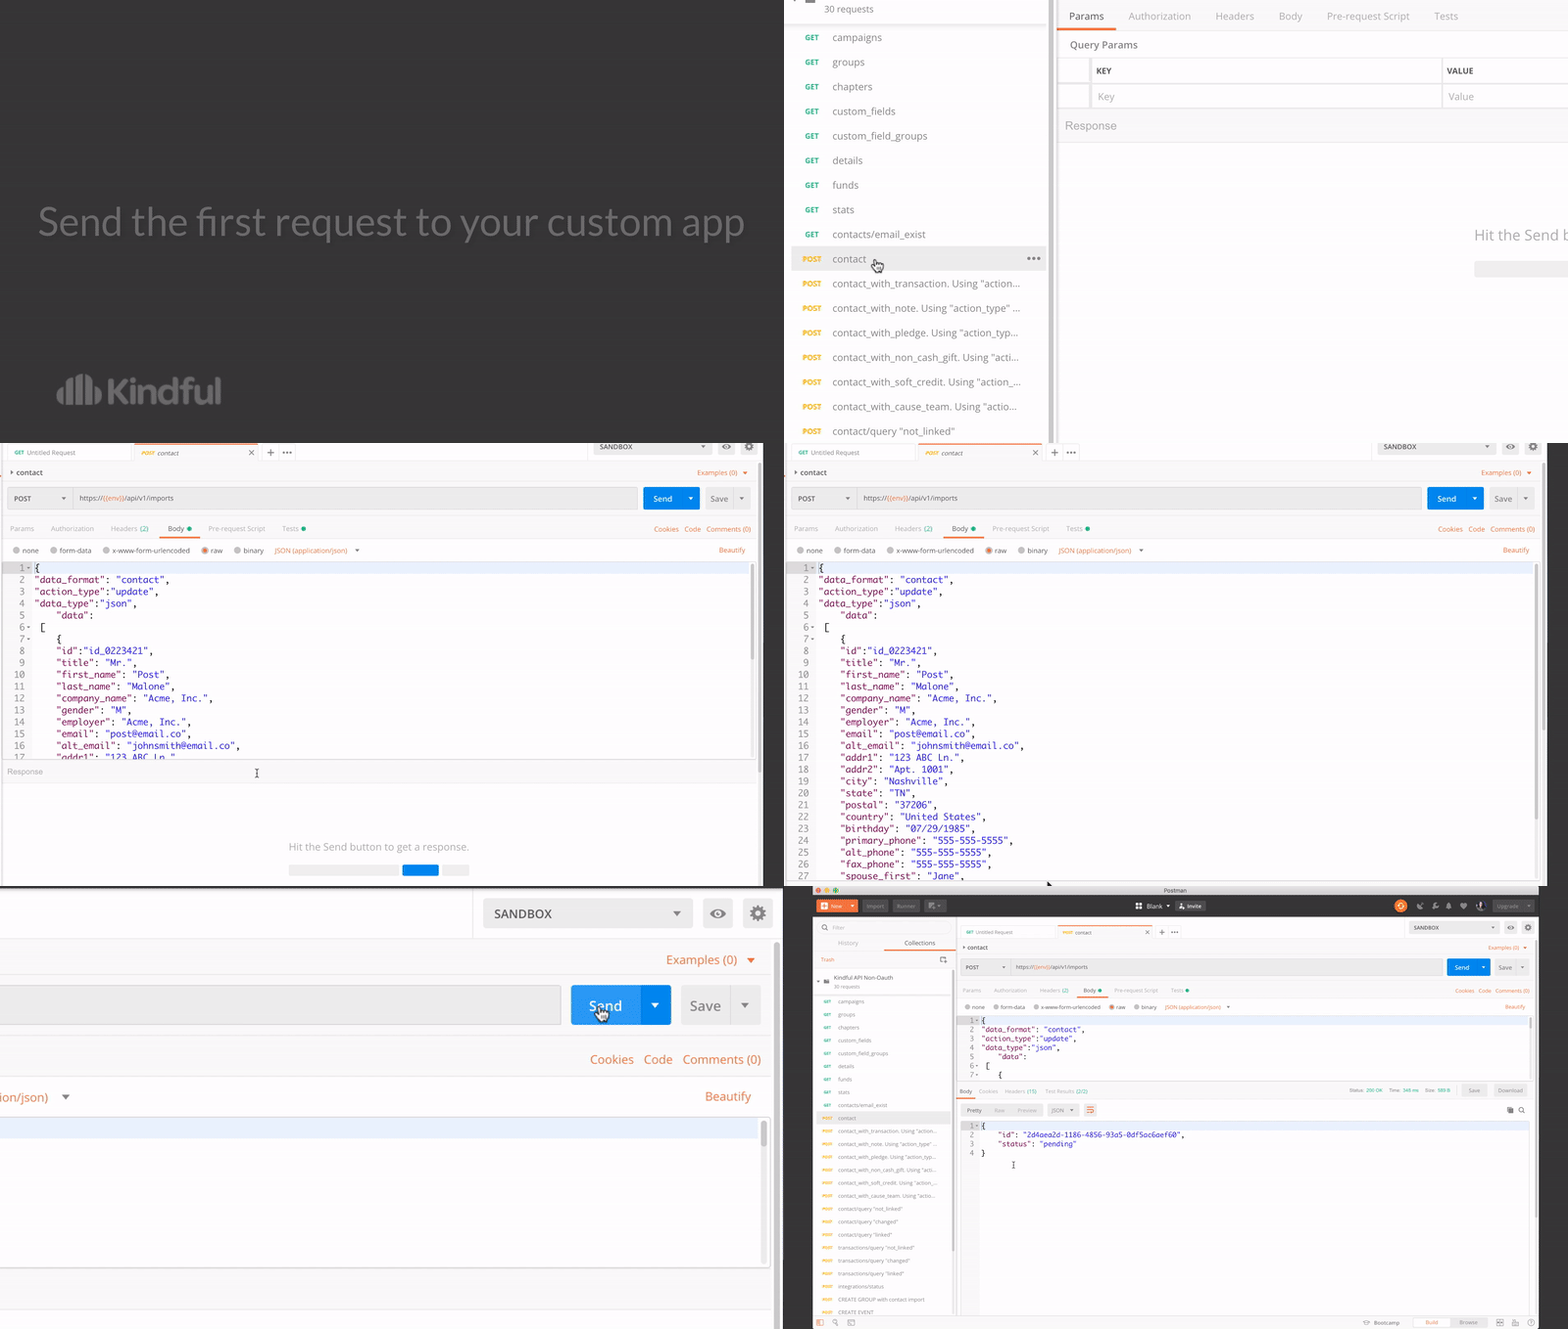
Now, here is where the fun begins! With your Sandbox environment set up, you should be able to send a test to your Sandbox!
- Ensure “SANDBOX” is selected in the environment dropdown in Postman.
- Under “Collections” in the “Kindful API Non-Oauth” folder, click “POST contact”.
- Click the blue “Send” Button next to the endpoint URL.
Your response should look like this:
{
    "id": "4d626eaf-5441-4d34-8a4f-5bc1d6baed83",
    "status": "pending"
}
HOUSTON WE HAVE LIFT OFF! 👏👏👏
HTTP Token: Access Denied
POSSIBLE ERROR: If the response is “HTTP Token: Access Denied,” you have used the incorrect Application Token. Be sure that you used the token that was generated in the Sandbox and not in Production.
THE FIX: If you have used the wrong Application Token, click the cog in the top right corner to open the “Manage Environments” dialog box. Select “Sandbox” and update your Application Token’s “initial value” and “current value”. Select “Update” and try the call again.
Check out your import in the Sandbox
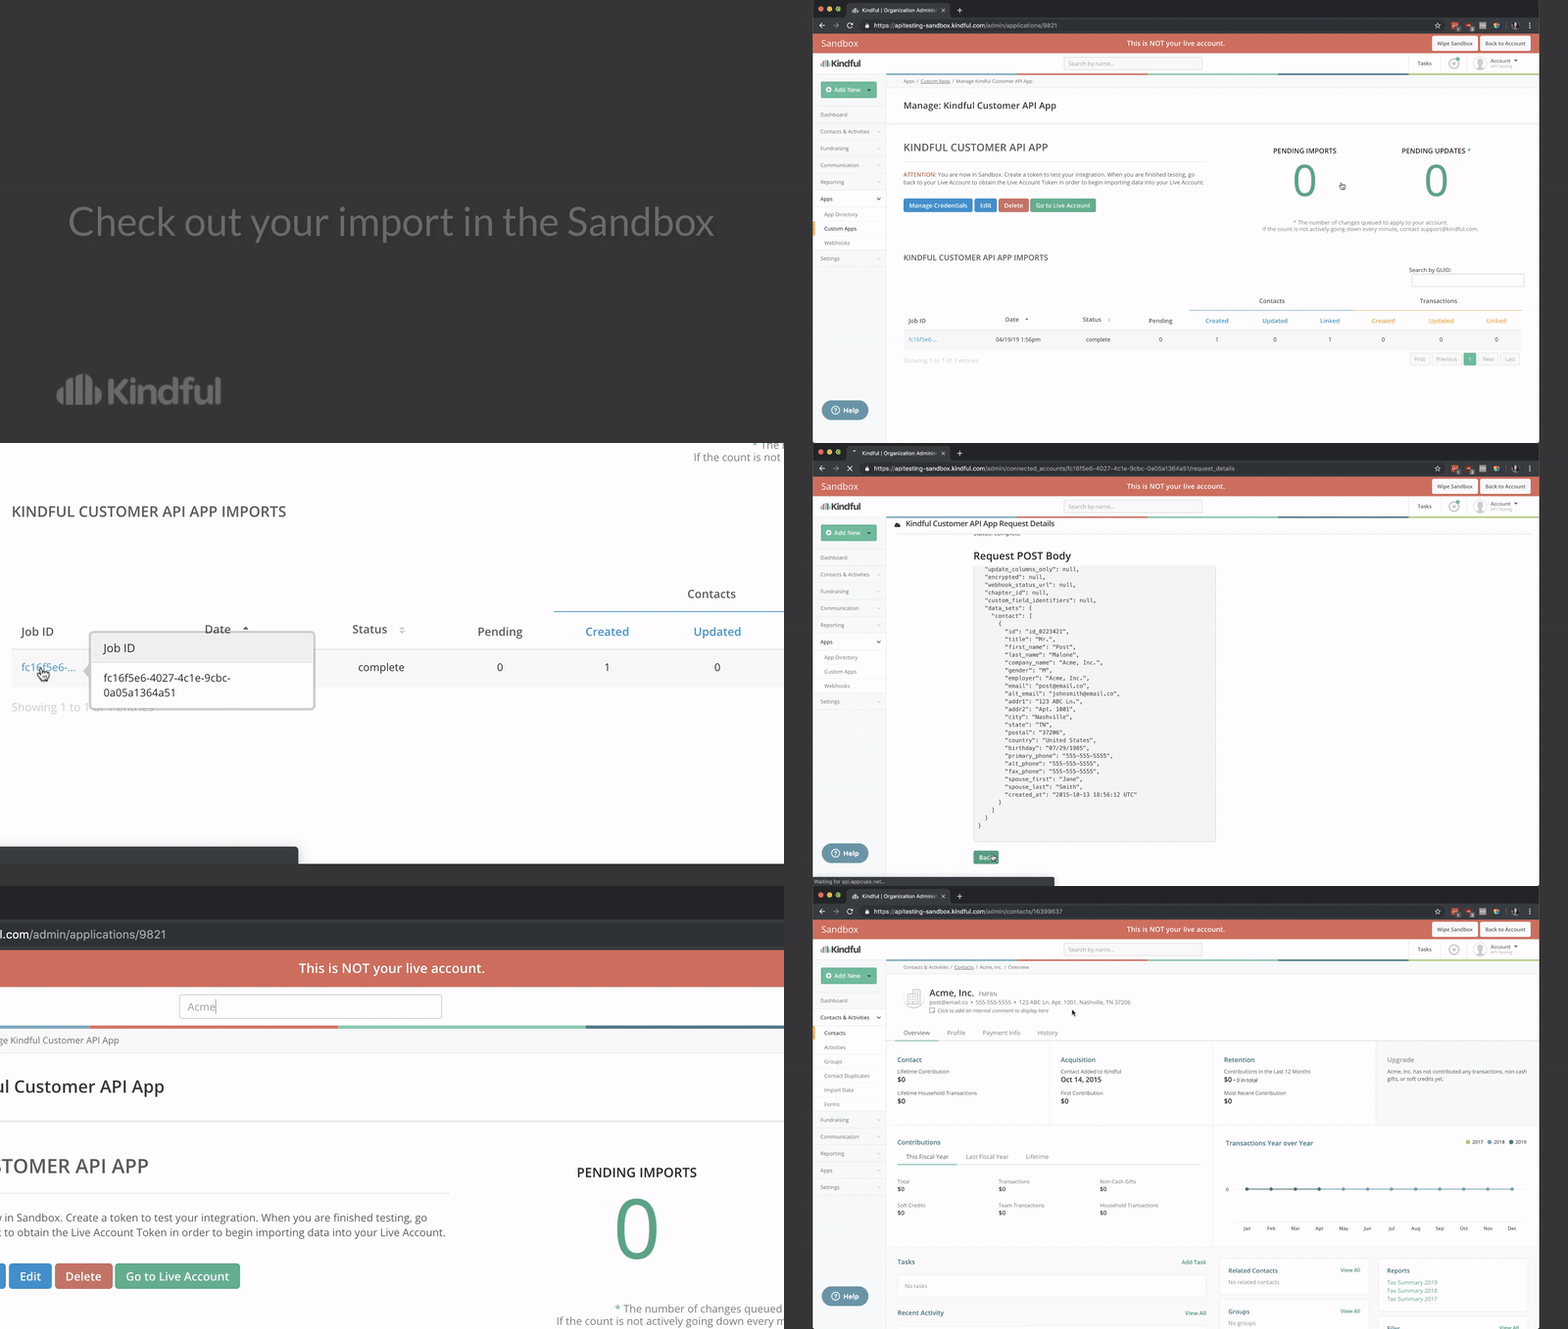
Let’s head back to the Sandbox. You will notice there is a new line item under “Imports”. The Status may be scheduled or complete.
Click on the “Job ID”. You will see all the details of your POST request.
Every import request you make will be located under imports. The new contact we created has the organization name “Acme, Inc.” Let’s look it up in the Sandbox.
In the search bar at the top of the page type “Acme, Inc.” and select the first option. This is the contact you pushed via your API call! Way to go!


